
I thougth I should tell you how I worked the edge to make it even and straight instead of leaving it zig zag...

Here's what I did...
I crocheted all the ripples following Lucy's method of Neat Ripple at Attic24. (I love her blog and colorful inspiration)
140 chains to start I think... all the way up until the desired size of the blanket...
So the edge of it...........
Starting on the top part of the zig-zag, the "Mountain" as Lucy call it, I worked sc's... and on my way down to the "Valley" I worked 2 hdc, 2 dc and 2 tr (one on each decrease of the valley), then up again:: 2 dc, 2 hdc and 4 sc (one on top of each of the V increases, as there's 2 increases, that makes 4 dc to work on sc)... then down and up again....
I got to the corner and worked a sc in the last stitch, then a chain and another sc in the same stitch... sc all the way down, making 2 sc on each dc (4 sc by color stripe as my stripes are 2 rounds of color).
Again to the corner:: sc, ch 1, sc...
And continue with the lower part of the blankie... now the valleys are the mountains and the mountains are the valleys if you know what I mean... this is because you are holding it up side down...
But you work the same as before...
I have to confess that I didn't worked the same as the top part... here I worked sc on top of the mountains (4 of them), 3 hdc, 4 dc, 3 hdc and back to 4sc...
It just worked like that for me... I don't know if the first group of stitches is better than the second one, but both my edges are straight now... and I like the look of it... a LOT!!!!
Here's a closer picture, I hope you can see it...
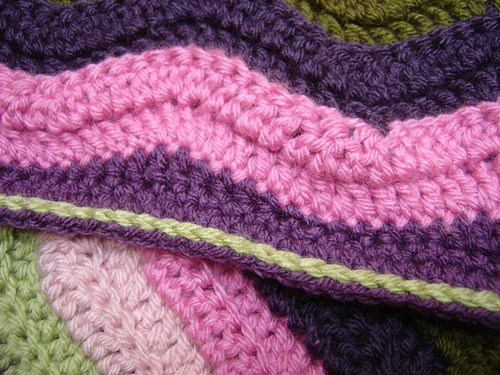
I finished the row going up on the other side of the blanket 2 sc on each dc... and made 2 other rows, one in sc and the last one in hdc... and then the sl st row in green on the top row of purple...
Hope this is useful for you!!!
See you soon!
S.
